
Projecting a Bipartite Network in Gephi
A bipartite network is one in which the nodes can be split into two groups, A and B, such that all of the links join nodes from group A with nodes from group B. There are no edges connecting two group A nodes with each other or connecting two group B nodes with each other. This network of HBO shows and the actors that appeared in them is a nice example (originally posted here).
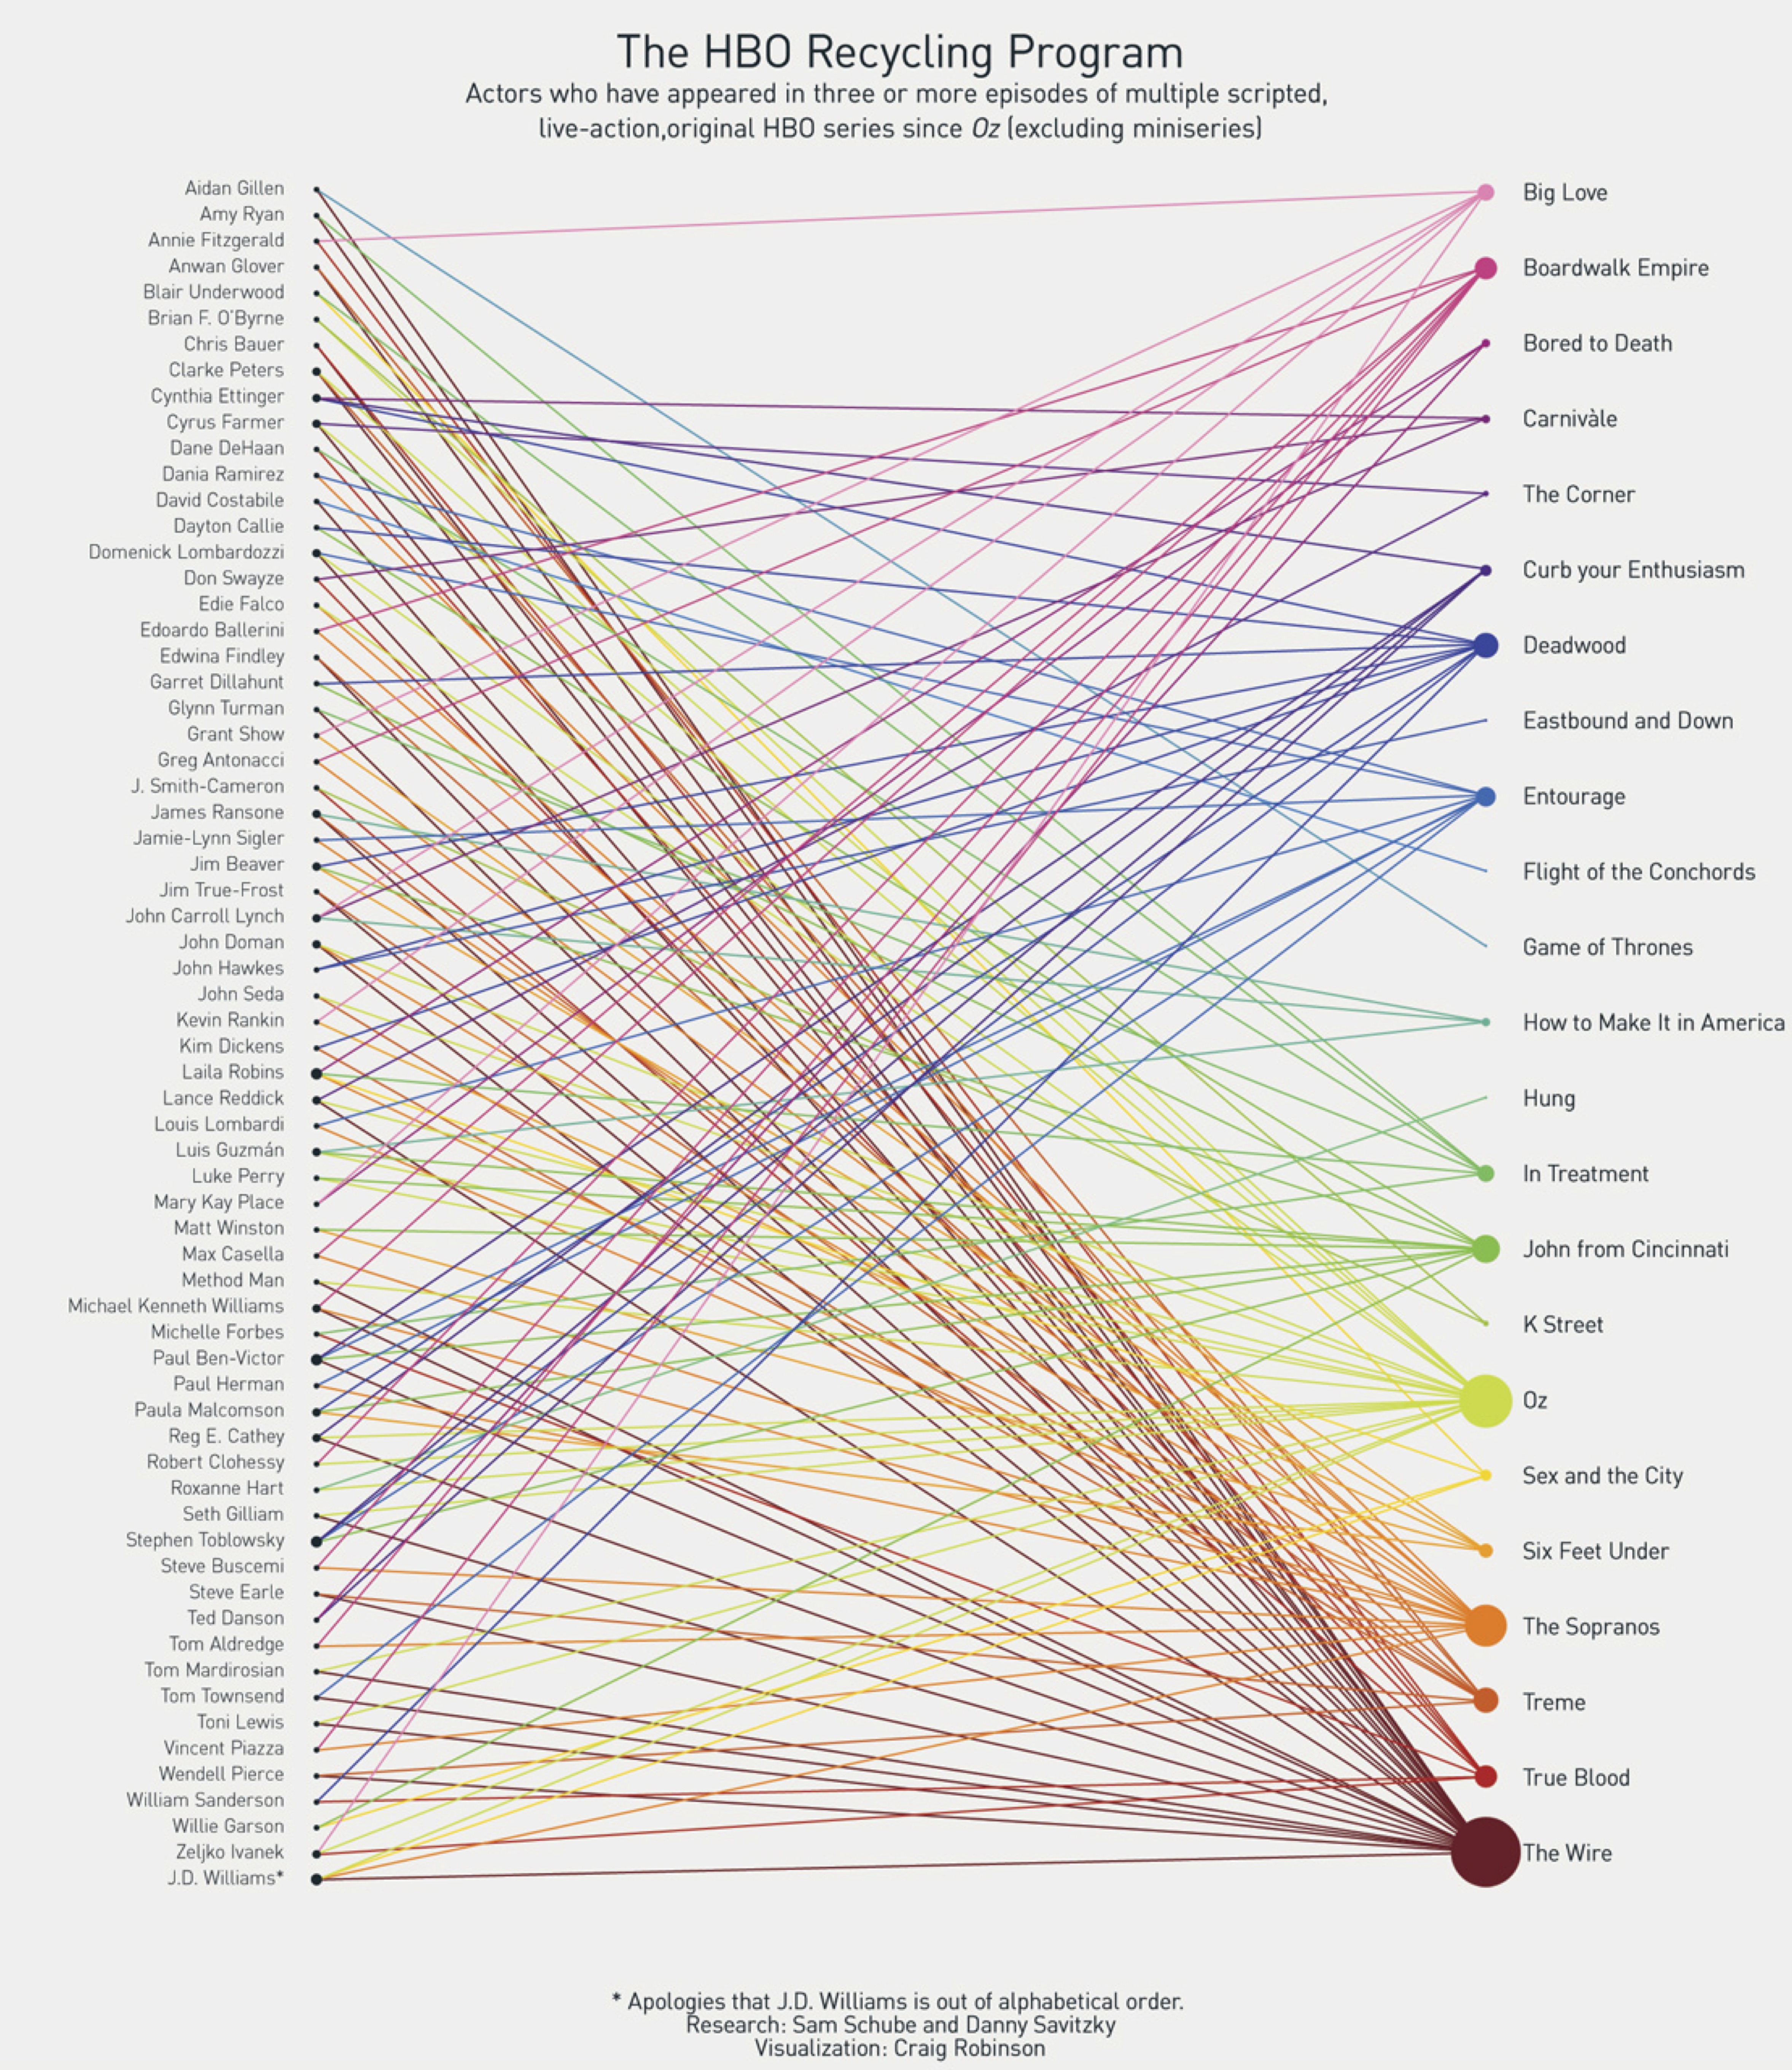
In this network the nodes are either actors or shows. Actors are connected to the shows they starred in, but there are no links connecting two actors to each other or two shows to each other because, of course, actors can't start in other actors and shows can't star in other shows. Other examples might include doctors and patients with doctors connected to the patients that they see, or students and clubs with students connected to the clubs that they are members of.
Every bipartite network can be projected to give two networks that have only one type of node. For example, our HBO network could be projected to give a a network of just actors, where two actors are connected if they stared in the same show; and the bipartite HBO network can also be projected to a network of just shows, where two shows are connected if the same actor starred in both of them. Projecting a bipartite network loses information, but sometime highlights specific features of a network that we want to focus on.
If you have a bipartite network in Gephi, there is a tool for automatically creating a projection. First, you need to add an attribute to the nodes that describes what type each node is, e.g. is it an actor or a movie. You do this by importing a nodes table with one column the node Ids and a second column giving the node type. So, you now have a new node attribute, maybe called nodeType, with values "actor" or "movie". At this point, I recommend saving a copy before proceeding.
The next thing you are going to do is install a plugin to Gephi called MultiMode Networks Transformation. Under the tools menu, choose plugins. Then under available plugins, select MultiModeNetworks TransformationPlugin. (If you have trouble installing the plugin this way, instead you can download the plugin here. Then in Gephi go to Tools... Plugins...Downloaded plugins, and select the downloaded file.) Once you have the plugin installed, under Window you should have a new window available called MultiMode Projections. Open this up, and hit the Load attributes button. Select nodeType for your Attribute type and click the Removed Edges and Remove Nodes buttons. Finally, you have to choose which projection you want to make. It's important that you have saved your work here, because Gephi does not have an undo button, and this next step will permanently change your network. You have to choose the left and right matrix to get the projection that you want. This works like matrix multiplication. If you want to project to an actor to actor network, choose "actor-movie" as your left matrix and "movie – actor" as your right matrix and hit run. If you want a movie to movie network, choose "movie – actor" as your left matrix and "actor – movie" as the right matrix and hit run. You should be left with the appropriate projected network.