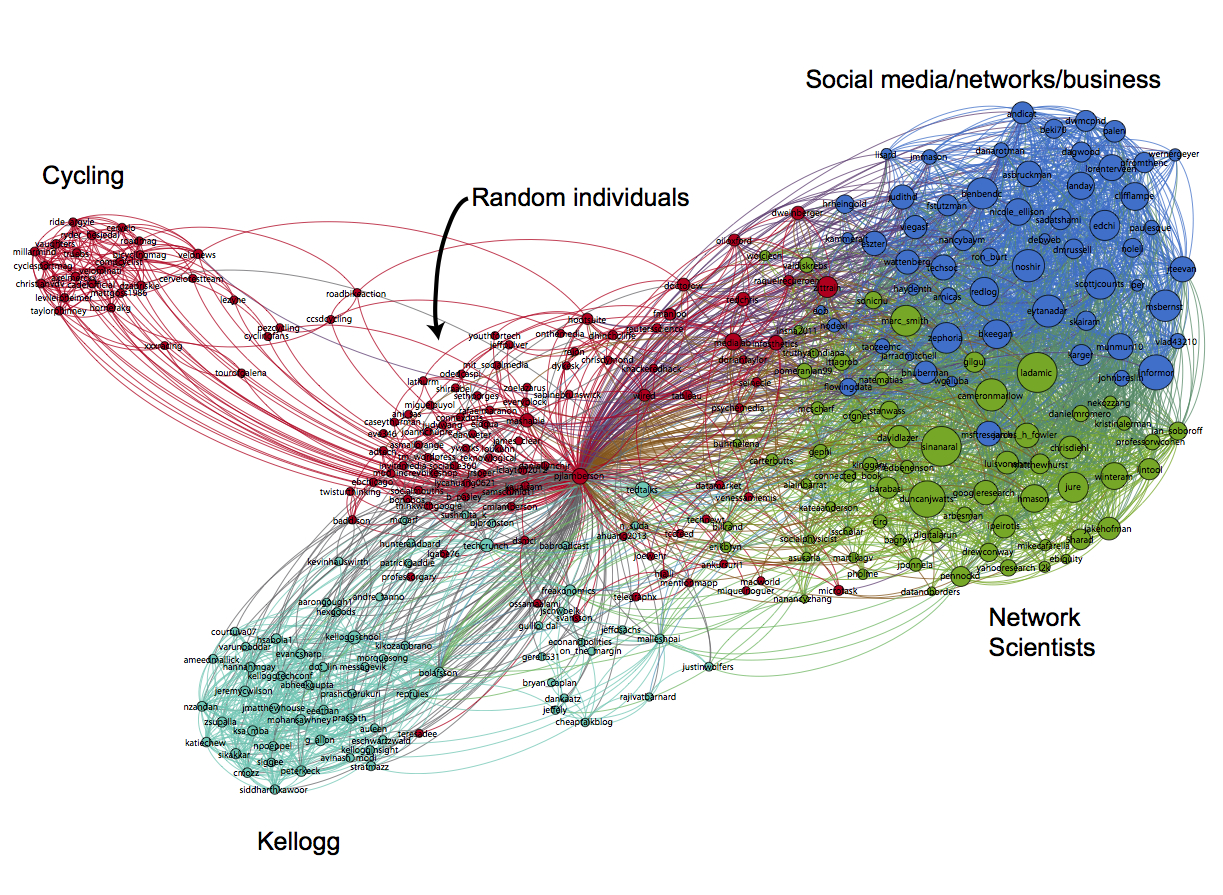
NodeXL is a freely available Excel template that makes it super easier to collect Twitter network data. Once you have the Twitter network data, you can visualize the network with Gephi. Here's how to do it.
Step 0: Start a Twitter account
If you don’t have a Twitter account, the first thing you need to do is go to https://twitter.com/ and start one. Besides the fact that having an account will make getting data faster, it’s good for you to have a little Twitter experience before you dive into the exercise. Once you’ve started an account, you’ll want to follow some people. Here are few suggestions to get you started:
@pjlamberson — of course
@KelloggSchool — self explanatory
@gephi — you know you’re a social dynamics dork when ... you follow @gephi on Twitter
@James_H_Fowler — professor of political science at UCSD and author of seminal studies of social contagion in social networks
@noshir — Noshir Contractor, Northwestern network scientist
@erikbryn — Sloan prof. with lot’s of stuff on economics of information
@jeffely — Northwestern economics / Kellogg prof. and blogger: http://cheaptalk.org/
@RepRules — Kellogg prof. Daniel Diermeier
@sinanaral — Stern prof. who did the active/passive viral marketing study and other cool network research
@duncanjwatts — Duncan Watts research scientist and Yahoo, big time social networks scholar
@ladamic — Michigan prof. who did the viral marketing study and made the political blogs network
And don’t forget to post a tweet! If you are a serious Twitter beginner, check out Twitter 101.
Step 1: Getting the Software
We will be using the software NodeXL to gather the data from Twitter. Besides downloading the data, you can also use NodeXL to visualize and analyze network data, but I prefer to export the data and use another program like Gephi to do the visualization and analysis. NodeXL is an Excel template, but it unfortunately only runs on Excel for Windows. You can download it at: http://nodexl.codeplex.com/ Once you have downloaded and installed the software, open it up by selecting NodeXL Excel Template in the NodeXL folder under All Programs.
Once the program is open, select the NodeXL ribbon.
Step 2: Getting the Data
Now we want to get some Twitter network data. We’re going to collect data on people that follow a person, company, or product, or if you want you can use yourself (this will only be interesting if you have a healthy Twitter presence).
Click on Import and select From Twitter User’s Network. You’ll want to authorize NodeXL to access your Twitter account by selecting the radio button at the bottom and following the onscreen instructions. Once your account is authorized, you should find a company or product on Twitter that you’re interested in (you can do this inside
Twitter via a browser). Enter that Twitter username in the dialog box labeled "Get the Twitter network of the user with this username:" For example, if you wanted to collect data on my Twitter account (
@pjlamberson) you would enter "pjlamberson" (you don't need the @). For the remaining choices in the pop-up window, select the following options:
Add a vertex for each: Both
Add an edge for each: Followed/following relationship
Levels to include: 1.5
Limit to XXX people — This is a key variable to set and really depends on your level of patience (see Warning: Twitter Rate Limiting below). If this is your first time, I suggest limiting to 200 people. With Twitter's new rate limits, even 200 people will take several hours to collect.
Click OK and wait for the data to download. This may take a while. Be sure that computer is set so that it does not go to sleep during the data collection.
Warning: Twitter Rate Limiting
Twitter limits the number of times per hour fifteen minutes that you can query the API (Application Programming Interface). You may be tempted to request more data — for example the level 2.0 network — or request one set, change your mind and request another etc... This can quickly put you up against the rate limit and you will have to wait an hour before any more data can be downloaded. NodeXL will automatically pause when you reach the Twitter rate limit and wait for an hour to begin downloading data again. If you have time to let your computer run all night (or for several days), then you can increase the limit to more people. However, if you do this you should set your computer so that it does not go to sleep.
Step 3: Exporting the Data
Once you have the data, you can either analyze it within NodeXL or export it to analyze using another program. For example, if you want to analyze the data using Gephi, click on Export and choose the GraphML format. This will create a file that Gephi can open.
Step 4: Visualizing and Analyzing the Network with Gephi
Now that we have the data, we want to create a visualization in Gephi. To open the network data in Gephi, just choose Open from the File menu and select the file that you exported from NodeXL. Initially the network will be a bit of a mess.
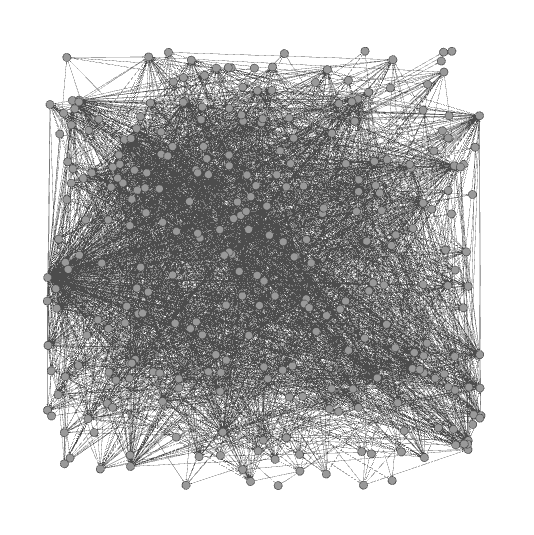
To get a better (and more useful) picture we will do four things — size the nodes by eigenvector centrality, color the nodes using a network community finding algorithm, add labels, and change the layout.
Sizing the nodes by Eigenvector Centrality
Eigenvector centrality is one measure of how important a node in a network is (network scientists use the word "centrality" to mean network importance). The simplest measure of centrality is degree centrality: the degree centrality of a node is the number of links that connect to that node divided by the number of nodes in the network minus one (we divide by n-1 because this is the maximum number of connections any node can have and thus rescales degree centrality to lie between 0 and 1). Eigenvector centrality not only takes into account the number of connections a given node has (its degree) but also the "importance" of the nodes on the other ends of those connections.
To size the nodes by eigenvector centrality, we first have to calculate the eigenvector centrality for all of the nodes. One minor annoyance is that NodeXL created an empty column for eigenvector centrality and until we delete that column, Gephi won't be able to do the calculation. To get rid of this column, click on the Data Laboratory tab at the top of Gephi. This will take you to a spreadsheet view of the network data. At the bottom of the window you will see a series of buttons that allow you to manipulate this spreadsheet. Click the "Delete Column" button and choose "Eigenvector Centrality." Now, go back to the Overview view by clicking Overview at the top left of the window. In the Statistics panel, click the Run button next to Eigenvector Centrality (if the Statistics panel is not showing, select it under the Window menu). Click Ok from the pop window that appears. A graph should appear showing the distribution of eigenvector centrality across the nodes in your network. You can just close this window.
Then go to the Ranking panel and select the symbol that looks like a little red diamond (this symbol is used to mean size in Gephi, I have no idea why). From the drop down menu that says "---Choose a rank parameter" select "Eigenvector Centrality." You can adjust the Min/Max size range for the nodes (I use 10 and 50) and then click the Apply button.
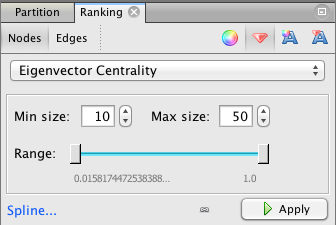
The nodes should now be resized so that the largest nodes have the highest eigenvector centrality.
Coloring the Nodes with a Community Finding Algorithm
One of the most interesting things you can look at in a Twitter network are different communities of Twitter accounts. We're going to use a "Modularity based community finding algorithm" to group the network nodes so that the groups have lots of connections within the groups but relatively few between groups.
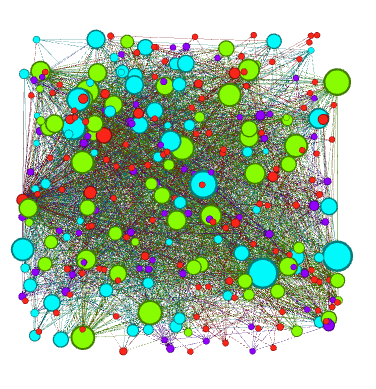
The first step is to hit the Run button next to Modularity in the Statistics pane. Click OK on the pop-up window and then close the distribution graph that appears. Now, go to the Partition window and hit the refresh button (it looks like two little green arrows pointing in a circle). Choose "Modularity Class" from the "---Choose a partition parameter" drop down menu. Notice that there are several other ways that you can group the nodes (e.g. by time zone) that you may want to come back and explore later. Gephi will show you the different communities it has identified along with the percentage of nodes that belong to each of those communities. For example, Gephi split my Twitter network into four communities. The largest community consist of 38.54% of the nodes and the smallest community contains 18.94% of the nodes.
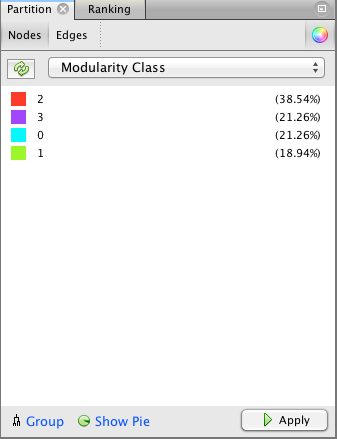
If you click the Apple button, Gephi will color the communities in the network. If you want to change the colors, just click on the color square in the Partition window. Here's what my network looks like now:
Adding Labels
The next step is to add labels to our network so that we can identify different accounts. This will help us to understand who the important nodes in our network are and what ties together the nodes within the different communities. To show the labels, click the black T at the bottom of the Graph pane. You can resize the labels with the right slider at the bottom of the graph pane. At the moment you probably will have a hard time reading the labels because they overlap one another, but we will fix that in a second.
Using a layout algorithm to rearrange the nodes
To reposition the nodes into a more useful arrangement we will use one of Gephi's built-in layout algorithms. I find that the Force Atlas algorithm works well for Twitter network, but you should play around with the other algorithms as well to find one that works best for the particular network that you have collected. You can select the algorithm from the drop down menu in the Layout pane, and try changing the various layout specific parameters to see what works best. Here's what I'm using:
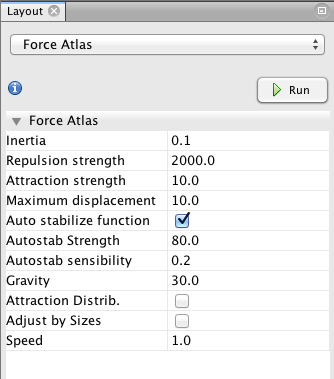
Hit the Run button to run the algorithm. If your network has a lot of nodes/links (or if your computer is slow), it may take awhile for the algorithm to move them around. Once you've found a nice arrangement, use the "Label Adjust" layout algorithm to move the nodes so that the labels don't cover one another up. Here's what i have now:
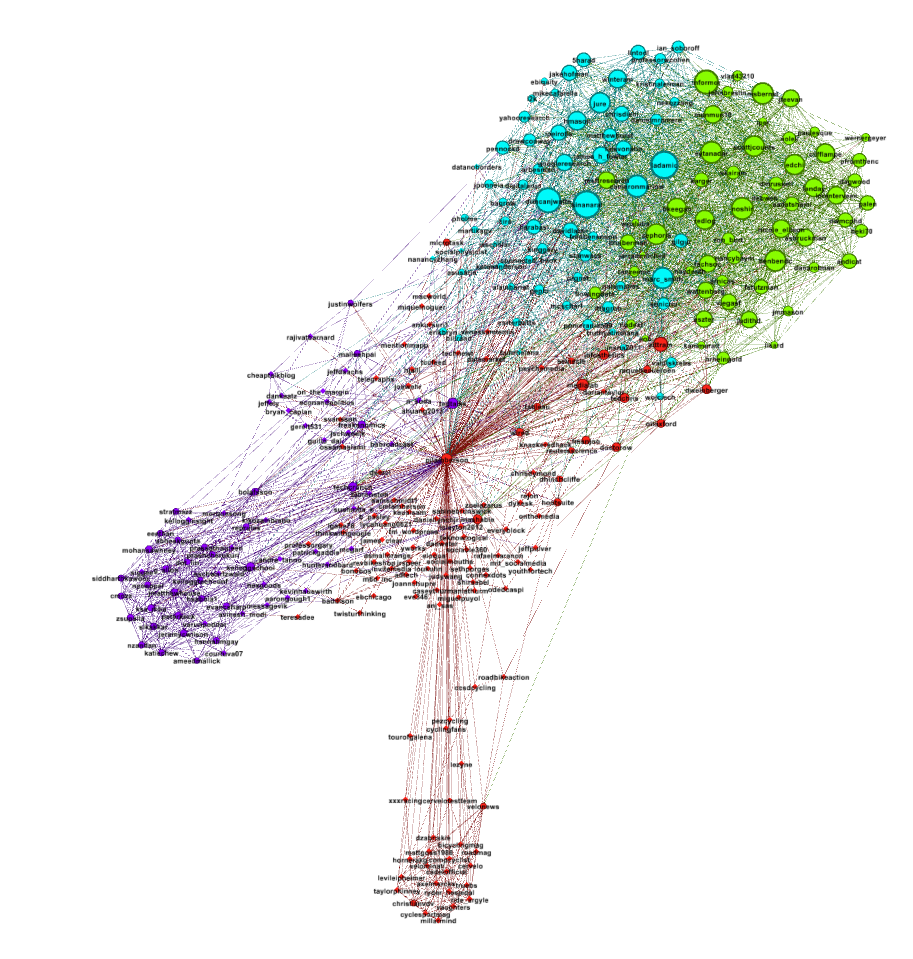
The only thing left to do is go over to the Preview window where Gephi will render a nice image for you once you click the Refresh button. You can make final adjustments such as hiding/showing labels and adjusting the label sizes in the Preview Settings Pane. You may have to iterate back and forth a bit between the Overview layout and the Preview to get everything just right.
Here's my finished product:
